Buscar
-

How to Protect Your Kids from Heatstroke
Summer is around the corner, bringing heightened risks of heatstroke, especially for children who cannot regulate their body temperature as efficiently as adults. Infants are particularly vulnerable and may not express discomfort, so never leave a child unattended in a vehicle. Top Tips for Preventing Heatstroke Reduce the number of deaths from heatstroke by remembering to ACT. Avoid heatstroke-related injury and death by never leaving a child alone in a car, not even for a minute. And make sure to keep your car locked when you’re not inside so kids don’t get in on their own. Create reminders. Keep a stuffed animal or other memento in your child’s car seat when it’s empty, and move it to the front seat as a visual reminder when your child is in the back seat. Or place and secure your phone, briefcase or purse in the backseat when traveling with your child. Take action. If you see a child alone in a car, call 911. Emergency personnel want you to call. They are trained to respond to these situations Keeping Your Baby Cool in the Back Seat In hot weather, it is crucial to keep your baby cool and hydrated by using a car seat cover or towel over them to reflect the sun's rays. Dress your baby in lightweight clothing that covers their arms and legs. Keep an eye on your baby's skin color. Move them to a cooler place if they look too red or flushed. Keep the temperature at a comfortable temperature for you, not for your child. Keep the windows cracked open for ventilation and ensure nothing is blocking the airflow from entering or exiting the vehicle. Dress your infant appropriately for their environment, including appropriate head and neck coverings, to keep them cool and protected from sunburns. Ensure you have enough fluids to last an hour before getting out of the car or use bottled water if possible. Never leave your child unattended in a car. Steps to Follow if You Suspect Heatstroke Call 911 immediately. Cool the victim – Get the person to a shady area, remove restrictive clothing and cover skin with sheets soaked in ice-water, and place ice packs in the arm pits and groin. Have the victim drink cool fluids, preferably an electrolyte-containing sports drink. Monitor body temperature with a thermometer but stop cooling efforts after temperature has dropped to 102 Fahrenheit. Baby Safe Classes These classes help prepare parents for emergencies that may occur in baby’s first year. Safe Kids Worldwide Did you know heatstroke is the leading cause of non-crash related fatalities in children? “On average, every 10 days a child dies from heatstroke in a vehicle. In more than half of these deaths, the caregiver forgot the child was in the car.”
-
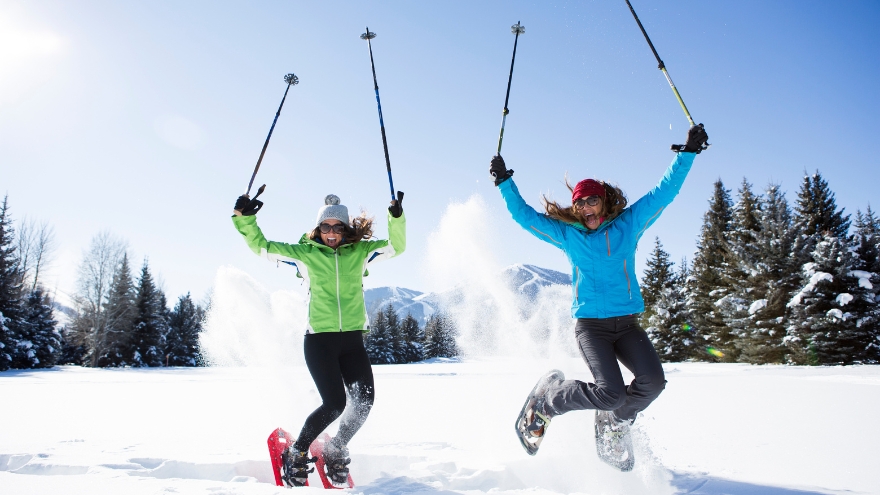
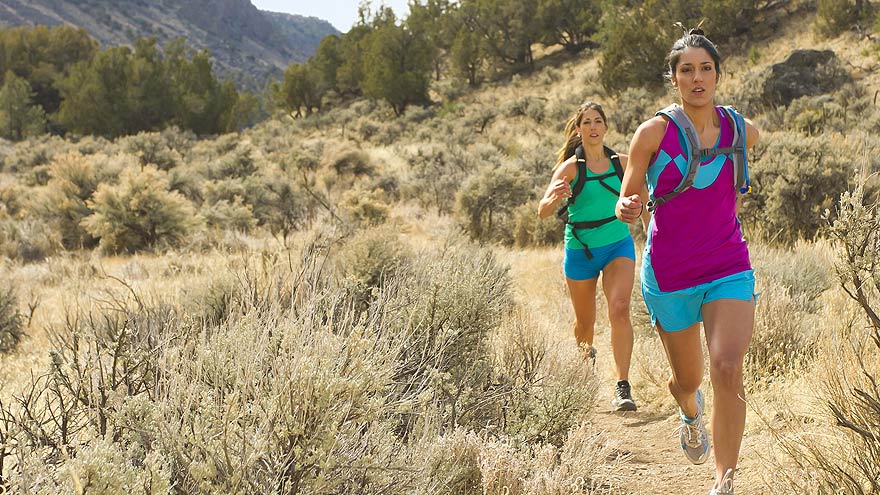
The Unmatched Health Benefits of Snowshoeing
Snowshoeing is an excellent winter workout that can help burn calories, strengthen muscles and boost cardiovascular health. Explore the top 8 snowshoeing spots and experience this ultimate workout adventure! Significant Health Benefits: Exceptional cardiovascular workout – burn up to 1,000 calories per hour! Low-impact muscle building Endurance building Balance strengthening and agility Improves your sense of well-being by connecting to nature Prepping for Your Adventure There are some crucial details to think about when it comes to snowshoeing, especially if you are a beginner. Make sure to pick the right kind of footwear to go on top of your snowshoes; a pair of comfortable waterproof boots are a great choice and remember to wear lots of layers. Several local places rent snowshoes if you aren’t sure about spending money on a pair. Check out Bobos Ski and Board Patio or our local REI Co-Op. Check out REI’s Beginner’s Guide to Snowshoeing for reference. 8 Cool Snowshoeing Spots 1. Galena Creek Park Close to Reno, this beautiful, low-altitude park offers several trails. You’ll find various creeks and streams under cover of pristine ponderosa pines. From beginner to advanced, the differing trail systems provide a challenge for everyone! Head west on State Route 431 (Mt. Rose Highway) for about seven miles until you see the park sign on the right side of the highway. 2. Tahoe Meadows – Chickadee Ridge This local favorite not only gives fantastic views of Lake Tahoe but the best part? – friendly little chickadees will eat seeds right out of your hand! Be sure to pack plenty of sunflower birdseed, as that seems to be their favorite. From the trailhead parking lot, head southeast into the open meadow. Then follow the ridgeline to your right (southwest). Continue southwest up toward the top of the ridgeline to the west, and you’ll get to Chickadee Ridge in just under two miles. 3. Spooner Lake Trail The easy 2.5-mile loop around Spooner Lake is excellent for all skill levels. This alpine lake is surrounded by aspen trees which house varied bird species, so bring your binoculars! Dogs are allowed on a leash, and all-day parking is $10. 4. Kirkwood Ski Resort You’ll need a trail pass, but this South Lake Tahoe resort has various routes from beginner to advanced, with roughly 50 miles of terrain. Nighttime snowshoe treks during the full moon are also available throughout the winter. Kirkwood is located on Highway 88, close to Carson Pass. 5. Camp Richardson Heading north, you can find this well-established and favorite local snowshoeing spot. If you’re up for an adventure, you can trek up to Fallen Leaf Lake. It’s located off Highway 89 and near Fallen Leaf Road. 6. Dry Pond Loop This moderate, 6.5-mile loop near Washoe Valley has impressive views of Carson Valley, Washoe Lake, and the Mt. Rose Wilderness. If you like the sound of rushing water, most of the trail meanders along White’s Creek. This area is dog-friendly and kid-friendly, which makes it a family favorite. 7. Royal Gorge Soda Springs is home to this resort, which is well known for its cross-country skiing trails. Enjoy extensive trails leading deep into the trees with spectacular views. Find Royal Gorge from the Soda Springs exit on West Interstate 80. 8. Ash Canyon Creek Tucked away in the Carson Valley, these trails are filled with mountain bikes in the spring and provide excellent snowshoeing trails in the winter. Find it from Interstate 580 by taking the Highway 395 Business exit to Winnie Lane.
Read More About The Unmatched Health Benefits of Snowshoeing
-
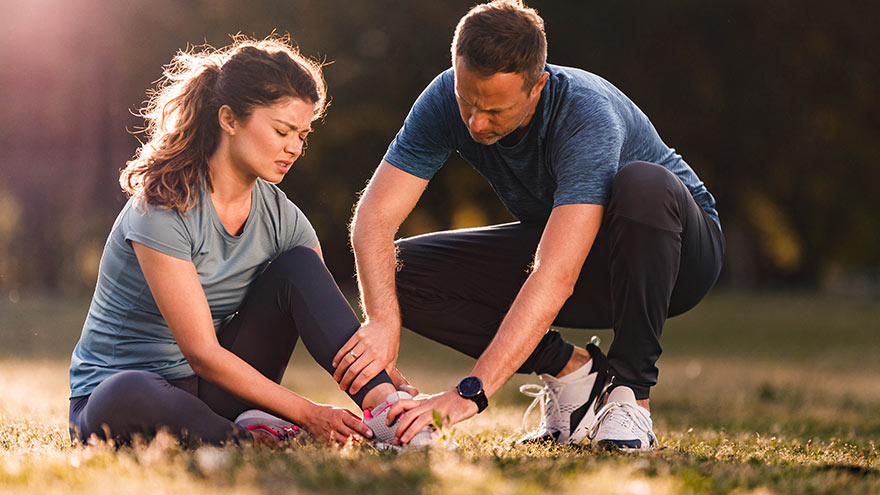
How to Treat a Sprain or Strain
Injuries happen to everyone. They are caused by participating in sports, recreational activities like hiking, and even by accidentally stepping off a curb wrong. If you experience a sprain or strain, the first few days are often the most painful. Renown Sports Medicine physicians Luis Palacio, MD and Brandon Hockenberry, MD walked us through what to do after an injury. Listen to Your Body See a medical professional right away if: You know or suspect that a bone is broken You are having difficulties putting full weight on a joint of the leg Pain or swelling is severe There is a sign of an infection, such as redness and warmth in the joint The First 24-72 Hours Joint sprains tend to swell more than muscle strains. You can use ice as needed for comfort and to relieve any pain, but do not use ice for more than 15-20 minutes at a time. Ice and NSAIDs (such as ibuprofen) can help prevent excessive swelling and mask the pain, but they do not speed recovery. Some research shows that overuse of ice actually delays recovery. During the first 24-72 hours, your injury will go through an inflammation phase. Inflammation is your body’s natural way to dispose of dead tissue cells, build new healthy structures, and hopefully heal even stronger than before.
-
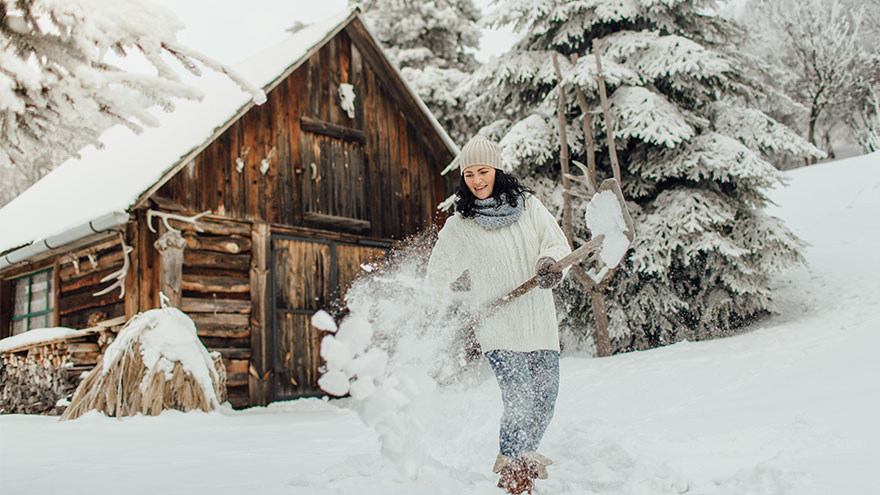
6 consejos para palear la nieve de manera segura
While the appearance of a winter wonderland in your yard can be a welcome one, an accompanying aspect is not: the idea of clearing your driveway and sidewalks. The sometimes-daunting task of snow shoveling is a repetitive activity that can cause muscle strain to the lower back and shoulders. However, by following the tips below, you will spend more time appreciating your winter wonderland -- when your sidewalk and driveway are all clear, that is. But, we all know that injuries happen, and if you do find yourself with back pain that does not resolve in a few days, contact your primary healthcare provider, or visit a Renown Urgent Care. Another way to avoid injury during strenuous activity, or help heal an injury that won't go away, is to work with a physical therapist who can offer at-home exercises to keep your body strong. 6 Tips for Safe Snow Shoveling Following these tips from the American Physical Therapy Association can help you avoid injuries: Lift smaller loads of snow, rather than heavy shovelfuls. Be sure to bend your knees and lift with your legs, rather than your back. Use a shovel with a shaft that lets you keep your back straight while lifting. A short shaft will cause you to bend more to lift the load. Using a shovel that’s too long makes the weight at the end heavier. Step in the direction where you are throwing the snow to prevent the low back from twisting to help prevent “next-day back fatigue.” Avoid excessive twisting because the spine cannot tolerate this motion. Bend your knees and keep your back as straight as possible so that you are lifting with your legs. Take frequent breaks when shoveling. Stand up straight and walk around periodically to extend the lower back. Backward bending exercises while standing will help reverse the excessive forward bending of shoveling. Stand straight and tall, place your hands toward the back of your hips and bend slightly backward for several seconds. When in doubt, ask for help. The Reno community is a generous one and you can typically find snow shovelers for hire on local message boards like Nextdoor and Facebook. Or, if you have a kid in your neighborhood, they might be looking to make some extra money on a snow day.
-

Top Safe Sleep Tips for Your Baby
Becoming a parent for the first time means lots of new unknowns – from learning to breastfeed and swaddle to buckling your newborn into the car seat for the first time. But when it comes to putting them to bed safely, it’s important to remember it really can mean life or death. It’s something we’re taught before our little one is even here: the correct way to put your baby to bed safely. Sadly though, the number of infant deaths continues to climb. The main culprit of sleep-related infant death continues to be all the items parents leave in the crib with their babies. According to the Center for Disease Control and Prevention, there are about 3,500 sleep-related deaths among babies each year. “The best advice is ‘bare is best.’ Keep your infant’s sleep space clutter free – no blankets, bumpers, toys or pillows,” said Karen Wagner, Pediatric Nurse Practitioner. Follow the ABCs for Safe Sleep Remembering the ABCs is an easy way to remember how to put your little one to bed safely. A: Alone No blankets, toys or pillows. “We do recommend using a sleep sack as a blanket alternative,” said Karen. “It prevents the risk of suffocation and keeps your baby warm.” Keep in mind, the greatest risk for suffocation happens when babies are under 1 year of age, so it’s best to save the toys, blankets and pillows for their “big kid bed,” or around 18 months old. B: Back The slogan “back is best” is another good reminder. Keeping your baby on their back until they’re old enough to rollover helps reduce the risk of Sudden Infant Death Syndrome (SIDS). C: Crib It is best to have your baby sleep alone in their crib. While co-sleeping may be enticing, especially after a late-night feed, it increases the risks of possible suffocation. However, “having your child in your room, in their own crib or bassinet, is protective for SIDS,” Karen said. “In fact, we think co-rooming reduces SIDS risk by almost 50 percent.” Co-rooming allows parents to keep new babies in close reach and helps parents oversee their baby’s sleep, just in case something happens.
-
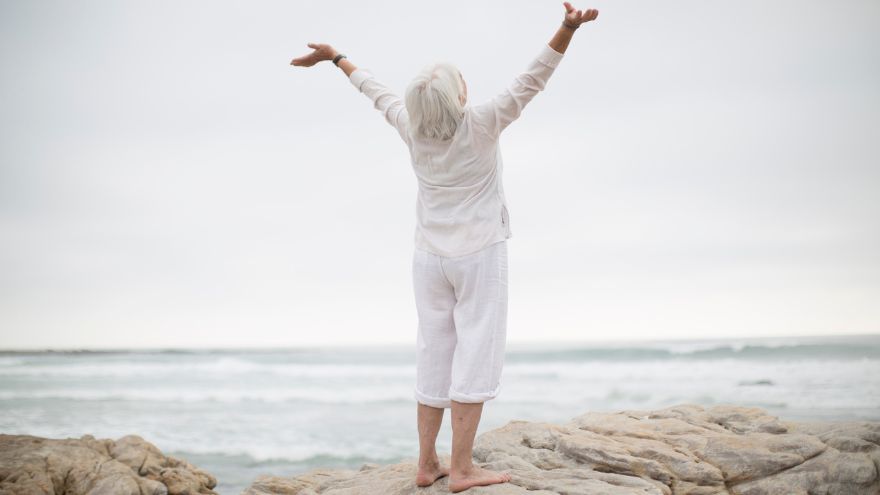
5 Tips for Healthy Aging
September is National Healthy Aging Month, which is described by Healthy Aging Magazine as a “month designed to focus national attention on the positive aspects of growing older.” What does healthy aging mean to you? If you're like most people, you're looking forward to removing the negative from your life – negative energy, thoughts, people and activities that don't contribute to your best life. While we remain focused on ridding ourselves of the negatives, we can forget about ways to strengthen the positive parts of our lives. Dr. Shruti Basho, a family medicine physician at Renown Health’s senior-focused medical group, provides us with five positive behaviors to focus on to improve happiness and life satisfaction. Healthy Aging in 5 Easy Steps Connect – Humans are naturally social creatures! Build connections with friends, family, colleagues and neighbors. Strong interpersonal connections help enrich your life with new experiences and opportunities. Having a support system to call upon in both times of need and times of celebration is priceless, especially as you age. Forming these bonds helps you stay healthier and happier well into your aging journey. Joining the Sterling Silver Club is a great place to meet more people in the community who want to live a healthy, fulfilled life just like you. Be Active – Regular exercise, particularly as you grow older, is vital to increase and maintain your endurance, strength and balance. But exercise doesn’t have to be a chore! Pick a physical activity that you enjoy – whether it be enjoying a nature walk, taking a power weightlifting class or anything in between. Being active will also help you build strong connections with others. If you need a workout buddy in your neighborhood, Nextdoor is a great resource to find people who live right around the block from you and may be looking for their next exercise partner. Take Notice – Curiosity and mindfulness can be an impactful motivator in positive cognition and behavior as you age. Like a child, see the wonder and beauty of the world. Notice the things around you – the weather, the landscape, the mood and the feelings of people. According to Harvard Medical School, changes in the aging brain "enable us to become better at detecting relationships between diverse sources of information, capturing the big picture, and understanding the global implications of specific issues.” By taking notice, it’s easier to learn to appreciate the things that matter. Keep Learning – Engaging with lifelong learning is one of the best ways to keep your mind active. Keep trying something new! Challenges keep you on your toes and increase your confidence and excitement in your day. Don’t know where to start? EPIC (Educational Programs Inspiring the Community) offers a diverse personal enrichment and professional development curriculum at Truckee Meadows Community College ranging from art classes to accelerated training certificate courses. Give – Be generous with your time, your knowledge and your talents by giving to friends, family and the community when you have the capacity. Lending yourself to others doesn’t have to be taxing – saying thank you and even just giving someone a smile can change the course of someone’s day. If you’re looking for a hands-on way to give back, Nevada Volunteers is a great place to find volunteer opportunities near you. Renown Health is also always looking for volunteers who are passionate about making an unforgettable difference to the people and communities we serve. Practice these five tips to improve happiness and quality of life at any age.
-

Three Things to Know About the Enhanced Benefits of Renown’s New Medicare Program
Renown Health recently announced that it has contracted with the Centers for Medicare and Medicaid Services (CMS) on a new program that offers enhanced Medicare benefits for Medicare beneficiaries. This new direct contracting Medicare program is designed specifically for patients with Original Medicare. Here are three things to know about Renown’s new program: The goal of the program is to help care providers work together to improve patients’ health by better coordinating patient care and reducing costs. Medicare beneficiaries who choose to sign up will have peace of mind knowing that they are in a program that ensures coordinated care along with potential cost-sharing assistance for chronic care management. Signing up for this program is easy – and it does not affect your existing Medicare benefits in any way. Simply click the button below, select either your current Renown Health or Geriatric Specialty Care provider from the drop down menu, complete the form and click “Submit Form.” It only takes a minute or two to fill out the form. You will be asked to provide the name of your primary care provider and be sure have your red, white, and blue Medicare card handy. Sign Up for Renown’s Enhanced Medicare Benefit Program Voluntary Alignment Sign Up Note: Participation in this program is voluntary. If you choose to sign up, your benefits will NOT change, and you can visit any doctor, other health care professional, or hospital. Learn more about Renown’s Direct Contracting Entity for Medicare Beneficiaries here. The statements contained in this document are solely those of the authors and do not necessarily reflect the views or policies of CMS. The authors assume responsibility for the accuracy and completeness of the information contained in this document.
Read More About Three Things to Know About the Enhanced Benefits of Renown’s New Medicare Program
-
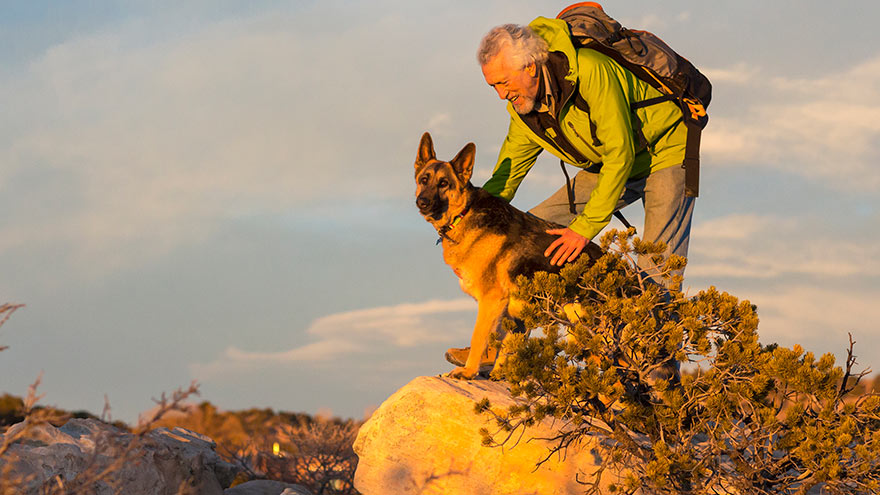
Emergency Hiking Kit Essentials
With the help of Aaron Bertalmio, MD of Renown Urgent Care, we're sharing nine essential must-have items for your hiking emergency kit. 9 Essential Items For Your Hiking Emergency Kit With more than 300 days of sunshine in Reno-Tahoe and plenty of trails to explore, you'll want to keep these essential items in your kit. 1. Water Surprisingly, this no-brainer, however, is often overlooked. Bring enough water to last for the entire adventure. This amount of water can be heavy depending on the distance, altitude or intensity. With this in mind, the next best bet is to filter or purify water from a lake or stream. Here's how: You can do this with iodine or chlorine dioxide tablets, charcoal or an ultraviolet light wand. Tip: Look for water that is moving or rushing over rocks. Having enough water or filtration cannot be underestimated. "If you become injured and need to wait for help, you can only last about three days without water," Dr. Bertalmio says. 2. Food Meals-Ready-to-Eat (MREs) or dehydrated food pouches are essential, ensuring you have plenty to eat if you're outdoors longer than expected. 3. Maps Bring a printed map, compass or GPS. You can't always rely on your smartphone, so this is the perfect backup plan. 4. First-Aid Supplies Your hiking first-aid kit should change based on the type of hiking. As a basic rule, keep the following items in your pack: Fever/pain reliever Sewing kit with safety pins Tweezers Bandages and moleskin Antibiotic ointment Duct or medical tape Whistle 5. Light Source Wear or pack a small headlamp to illuminate the way if you get caught outside after sunset or in a poorly lit area. Headlamps are also great in emergencies because they are hands-free. 6. Emergency Shelter Even if you're only going out for the day, pack a low-weight emergency blanket for the trip. In other words, if the day trip turns into an overnight adventure, the blanket will keep you warm and alive in the event of cold temperatures. 7. Fire Starter Pack small tools in your hiking emergency kit to ensure an easy fire start. Waterproof matches, a knife, a lighter, or a strike fire starter are great options. Tip: Bring a multi-tool, including a knife and scissors that can be used for first-aid. 8. Layers of Clothing Mother Nature likes to change her mind in northern Nevada, and temperatures vary significantly within 24 hours. Therefore, pack a compact, lightweight waterproof and windproof jacket. This will protect you from being uncomfortably chilly and experiencing hypothermia. "Hypothermia is when your body temperature drops to a dangerously low level. You want to avoid this completely by keeping body temperature regulated outdoors and avoiding cold water immersion," says Dr. Bertalmio. 9. Sun Protection Certainly, sun protection should be part of your daily routine and an essential in your hiking emergency kit. You'll want to bring enough sunblock to reapply in direct sunlight and layers to cover exposed skin every two hours. Dr. Bertalmio reminds everyone the sun is intense in northern Nevada. "The higher altitude means an increased risk of sun-induced skin damage," he explains. "Some trails can reach above 10,000 feet, and at that altitude, UV radiation could be 35 to 45 percent more intense than at sea level."
-

La historia de Paola: incorporar la esperanza y la determinación en el cuidado del paciente
You may recognize her from billboards around town or the cover of Renown's latest annual report, but what you might not know is the story behind the now-familiar face. Paola Espinoza-Patino is the oncology unit's associate nurse manager at Renown Regional, and she grounds her work in hope and determination daily. Meet Paola:
Read More About Paola’s Story: Bringing Hope and Determination to Patient Care
-

Don’t Put Your Bladder Health on Hold
Millions suffer from urinary incontinence (urine leakage). Often people feel as if their bladders control their lives. But this doesn't have to be your story. Bladder control issues are treatable and you can take steps to help control your bladder. What is urinary incontinence? Men and women of all ages can have difficulty controlling their bladders. Urinary incontinence occurs when the muscles in the bladder that control the flow of urine contract or relax involuntarily. Is there more than one type of urinary incontinence? Yes, there are three main types: Stress incontinence is when the bladder leaks small amounts of urine as a result of physical stress or pressure on the muscles supporting the bladder caused by coughing, sneezing, laughing, lifting or any sudden physical exercise such as running or jumping. Urge incontinence is the inability to control a strong urge to go without advance warning, limiting the time needed to get to the bathroom. Overflow incontinence occurs when the bladder does not empty properly. As a result, over time, large quantities of urine are stored, causing the bladder to overflow (this is more common in men and is often the result of an enlarged prostate blocking the bladder opening). Are there any tests that can determine the cause and type of incontinence? Your doctor may have you track your fluid intake and output in a Bladder Diary. A urinalysis can be checked for infection, traces of blood, or other abnormalities. Blood tests can look for chemicals or substances that may relate to contributing causes. Other testing may be an ultrasound, cystogram or post voiding residual measurement. How is urinary incontinence treated? Exercises to strengthen the pelvic floor muscles or restrain the bladder to hold on for longer. Medication can relieve and control the troublesome symptoms. If there is an infection an antibiotic is used. Surgery can repair weakened muscles or remove blockage. Special products such as pants, pads, collection devices, and chair and bed protection may be needed if the problem cannot be controlled. How do you strengthen your pelvic floor muscles? To make your pelvic floor muscles stronger, alternate between squeezing and relaxing them. Following the steps below may help: Squeeze your muscles for one second and hold. Relax your muscles for two seconds. Each time you squeeze and relax, it counts as one set. Complete five sets. When you can do the exercises easily, increase to doing them 10 times per day. When that gets easy, try to squeeze and hold the muscles for three seconds and then relax the muscles for three seconds. As your pelvic muscles get stronger, you can progress to longer squeezes for about 10 seconds. Be sure to relax between squeezes so that your muscles can rest before squeezing again. You should do these exercises in three different positions. Do 10 sets lying down, 10 sitting and 10 standing. It is important that you develop the habit of doing the exercises every day. You may want to exercise just after you get up in the morning and right before you go to bed at night. What can I do to help control incontinence? Watch your weight, practice pelvic floor muscle exercises, eat plenty of fresh fruits, vegetables and fiber to prevent constipation. Most importantly, talk to your doctor regarding incontinence issues, don’t be embarrassed!
-
5 Tips to Protect Your Knees from Pain and Injury
Knee pain and injury can restrict movement and make it difficult to be active, but studies show that the right type of exercise can help prevent these issues. It’s no wonder our knees are highly prone to injury. They house a complex network of muscles, ligaments and joints, and are crucial to our agility and daily movements. If you are experiencing knee pain, it’s important to not ignore this message from your body. While it’s fairly common to have occasional aches, if the pain limits your ability to perform normal daily activities like climbing stairs or walking with ease, have a medical professional check it out. “The take-home message here is to listen to your body,” says Amanda Henriques, PT, DPT at Renown Physical Therapy. “We are all built differently and respond to exercise in different and unique ways. Running may feel great for one person, but always lead to injury for another.” At any age, it's important to protect and strengthen your knees to help prevent pain and injury. Here are five tips from our experts: 1. Strengthen your muscles Choose exercises that focuses on the muscles around your kneecaps, hips and pelvis and places extra emphasis on your core. These muscles will absorb some of the stress places on your knees, helping them stay balanced and stable. 2. Maintain a healthy weight Each pound of body weight produces five pounds of force on the knee. If you need to shed weight, start with low-impact activities to avoid increased stress to your joints. 3. Pick the right exercise Opt for exercise that put less stress on your knees, such as cycling, walking or swimming. Choose flat surfaces when walking for exercise and avoid activities that put extra stress on your knees, such as deep knee bends or downhill running. 4. Warm up before working out Don’t overdo the workouts in length or intensity, and stretch after exercise to help prevent injury. 5. Avoid high heels Wear shoes with good arch support specific to your choice of exercise that provide a stable base for your feet and legs. Replace running shoes every 300 to 500 miles. Other athletic shoes should be replaced after 500 miles of wear. These tips can help keep your knees strong and prevent injury. But if you experience an accident or trauma, seek medical attention and follow up with any rehabilitation recommendations you receive. Depending on the injury, your doctor may recommend physical therapy, where you will be guided through individualized exercises to strengthen and heal. “If you listen to your body and take the appropriate preventative measures, you can find the right type of exercise to keep you happy, healthy and fit for life,”
Read More About 5 Tips to Protect Your Knees from Pain and Injury
-

Baby's Ears and Altitude Changes
One of the best things about living in the Reno area is the beautiful mountain range that surrounds our city. Many families take advantage of the activities the mountains have to offer or travel over them to visit friends and family in neighboring areas. However, for parents of infants there is often angst over your baby’s ears and altitude changes and the associated potential for ear pain and/or “popping.” Fortunately, there are things you can do to protect your infant’s ears the next time you drive over the mountain or hop on a plane with your little one. Baby’s Ears and Altitude Changes: What Causes Them to “Pop” The simple answer is pressure. The problem originates in the middle ear where there is an air pocket that is vulnerable to changes in pressure. The Eustachian tube, which runs behind the nose to the middle ear, is constantly absorbing and resupplying air to this pocket to keep it balanced. When the pressure is not balanced, your ears feel “clogged” or like they need to “pop.” In some cases this sensation can cause significant ear pain and even temporary hearing loss. Rapid changes in elevation or altitude, like driving over a mountain, or ascending or descending on an airplane, can cause rapid changes in pressure. In order to avoid problems, the Eustachian tube needs to open widely and frequently to equalize those pressure changes. The problem often intensifies during descents as you go from an area of lower atmospheric pressure to an area of higher atmospheric pressure. This is why you hear babies screaming on planes during descent or why your infant is wailing in the car seat as you head down the mountain. What can you do to make it a more comfortable trip for your child? First, be prepared. Babies cannot intentionally “pop” their ears like adults can, but we can help them by encouraging them to swallow. Offer your baby a pacifier or bottle while making ascents and descents. If possible, it may be helpful to have an adult ride in the back seat with baby if you’re in the car to ensure this can happen. Don’t let your baby sleep during descent on a plane. Help your little traveler out by offering him or her a pacifier during this process, as descent is the most likely time for pain associated with altitude changes. If your baby is congested prior to travel involving altitude changes, seek the advice of your pediatrician since they may have other solutions, including medications such as decongestants. If you return from a trip and notice your infant is still fussy and uncomfortable, contact your child’s doctor for a thorough ear evaluation. Safe travels!