Buscar
-
5 consejos de entrenamiento para una temporada invernal épica
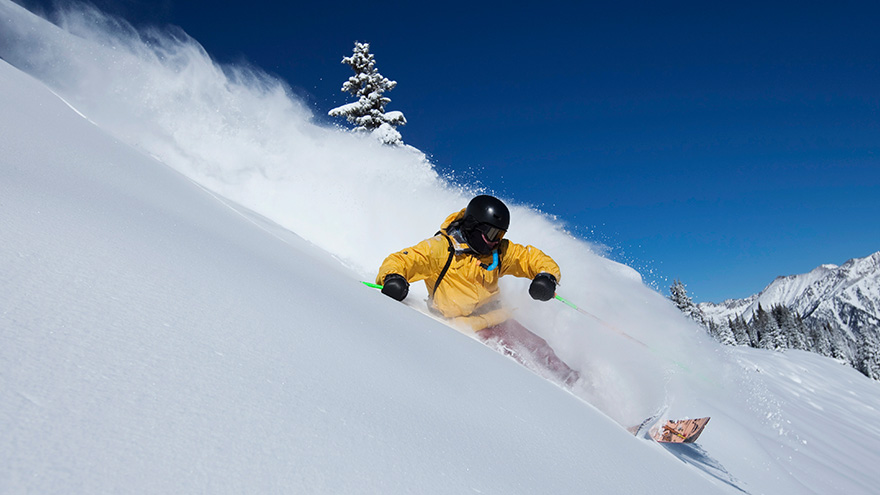
Whether it’s cross-country or downhill skiing, snowboarding or snowshoeing, your off-season preparation is vital to an injury-free and healthy experience once the snow starts to fall. We’ve got you covered with expert tips that will make you the king or queen of the hill. Millions of skiers and snowboarders hit the slopes annually. So whether you’re a weekend warrior or stay active year-round, you need to prepare your body for the demands of your favorite winter sport to avoid minor aches, pains or even severe injury. Count on two to three weeks for your body to adapt to the physical challenges ahead if you’re active. Otherwise, give yourself a minimum of six weeks to gear up for the snow. Ready to shred? Here are some conditioning tips to help put you on the path to a fun, successful winter season. 1. Start With Cardio Cardiovascular exercise increases endurance as it conditions the heart, lungs and muscles and provides a solid foundation for other forms of exercise. And when you live and play at altitude, you need even more endurance. “Research shows that our maximum heart rate, cardiac output and ability to exercise are suppressed at altitudes over 5,000 feet,” explains Daniel Staffa, PT, DPT, OCS, of Renown Rehabilitation Hospital. “In the Reno-Tahoe area, altitudes can quickly rise over 8,000 feet when we exercise in the Sierras, so it’s critical to have cardiovascular fitness to avoid associated fatigue and decreased mental alertness on the slopes.” Try this: Pick an aerobic activity you enjoy — speed walking, running, hiking, biking or a cardio machine like the elliptical trainer. Build up to a minimum of 30 minutes, three days a week. 2. Increase Your Strength Your core works overtime to stabilize the body and absorb the shock of pivots and turns and variable snow conditions. Strengthen your core, lower back, hamstrings and calves and you’ll go a long way toward guarding against ligament tears and damage to other joint structures. Stronger muscles will also allow you to relax while maintaining control and making those quick adjustments that uneven terrain demands. Try this: Squats, wall sits and lunges. Work your core and lower and upper extremities with a variation of sit-ups, crunches, back extensions and planks. 3. Integrate Plyometrics Staffa explains that if your legs aren’t used to absorbing the impact of landing, severe injuries can occur. Preempt such trauma with plyometric exercises, or “explosive movements,” that simulate the movements of your favorite sport. You’ll develop greater power in your legs when you combine plyometrics with your strength training. Try this: Incorporate multi-directional drills — such as lateral jumps and forward and backward jumps — on variable surfaces like a trampoline, solid ground, or a box or step. Here’s a challenge for the more advanced: Stand in front of a bench or box (12 inches or so). Jump up and then immediately back down. Do this 10 to 30 seconds at a time, rest and repeat. Or get old school and bust out the jump rope. 4. Improve Your flexibility Flexibility is the ability to move joints through their entire range of motion, from a flexed to an extended position. Being flexible will allow you to pivot, twist and turn and navigate varying snow conditions with ease. You can increase your flexibility while maintaining bone alignment with stretching. Don’t forget to warm up and cool down. Try taking it easy the first 15 minutes of your day on the hill; try starting with a beginner’s run or walk to warm up and prepare your body. Do the same at the end of the day or go for a brisk walk to cool down. Stretching will help return muscles to their normal length. Try this: Dynamic stretches such as leg swings, arm swings and torso twists. Target your quads, hamstrings, calves, and lower back. 5. Fuel for the Hill Staffa suggests loading up on healthy complex carbohydrates the day before you go out and bring along your favorite protein snacks. Assess the slopes before making that first run — is the snow heavy, fresh or wet — and stay mindful of your fatigue level throughout the day. Don’t forget to hydrate and re-hydrate before, during and after exercise. And most important, have fun! Visit Renown Physical Therapy and Rehab for more information. Or call 775-982-5001 to consult with our sports and orthopedic experts who can help you develop an individualized training program in preparation for the winter season, including methods for overcoming previous injuries and limitations.
-

Ask the Expert: What is Scoliosis?
Posture is important, but for those children diagnosed with scoliosis (spinal curvature) it can be a difficult issue. The Washoe County School District Student Health Services Department screens 7th grade students for scoliosis as growth spurts often reveal the condition and, if diagnosed early, scoliosis can stop progressing. We asked Michael Elliott, MD, head of the Department of Pediatric Orthopedics and Scoliosis to answer some frequently asked questions about scoliosis. What is scoliosis? There are many types of scoliosis: early onset (occurs before age 10), congenital scoliosis is when the bones of the spine do not form correctly, neuromuscular scoliosis which is due to children’s neurologic and muscle disease, and the most common is Adolescent Idiopathic Scoliosis. The term “idiopathic “ means the exact cause is unknown, although we do know it runs in families. This type of scoliosis occurs in 2-3 percent of adolescents and is mainly seen during their growth spurt. This is why middle school screenings are recommended. Both genders get scoliosis but girls are 8 times more likely to have their curves progress and become larger. What are the signs that my child may have scoliosis? A few signs for parents to watch for are: One shoulder might be higher than the other. One leg may seem longer. A hip may be higher or look more prominent. The waist may not look the same from side to side (asymmetry). The trunk or rib cage may be more prominent on one side or shifted. When they bend forward they may have a bump on their back. How is scoliosis diagnosed? It can be noticed by a pediatrician at a physical, school screening nurse, PE teacher or parents. Once the curve is suspected the child is usually referred to a pediatric orthopedic surgeon scoliosis expertise. At the initial visit the doctor will perform a thorough physical including a complete neurologic exam to assess the amount of curvature. Once the exam is completed the physician will determine if a spinal x-ray is needed. The curve on the x-ray is measured utilizing the cobb angle (a measurement in degrees) which helps guide the treatment. What are common treatments for scoliosis? The treatment depends on the size of the spinal curve and the amount of growth the child has remaining. An x-ray of the child’s hand is used to determine the amount of growth remaining. This allows the determination of the child’s bone age, and based on the hands growth plates it can determined if the child is in their rapid phase of growth. Treatments include: Observation - For curves less than 20-25 degrees. This entails visits every 6-9 months with a repeat scoliosis x-ray. Since scoliosis curves increase only 1-2 degrees per month, and variations in measurements can be 3-5 degrees, an x-ray is not recommended before 6 months. If the curve remains less than 25 degrees the child is followed until their growth is completed (usually age 16-18). Progressing Curve - If growth is finished and the curve is less than 40 degrees, the risk of more curvature into adulthood is small. If growth is completed and the curve is over 45 degrees, the child is followed for several years as these curves can progress into adulthood. If the patient is still growing and the curve has progressed greater than 25 degrees but still in the non-operative range (less than 45-50 degrees) bracing is used to stop the progression of the curve. Bracing - Indicated for curves over 25 degrees but less than 45 degrees. If a brace is required you will be referred to an orthotist (bracing specialist). The orthotist assesses your child, reviews the x-ray and then fits the brace. (Having a brace made usually takes 2-3 weeks.) Once the brace is fit, your child will visit the scoliosis specialist for an x-ray in the brace to ensure it fits correctly. The primary goal of bracing is to halt progression of the curve and prevent the need for surgery. The brace must be worn for about 16 hours per day to be effective. In a recent bracing study 72% of the patients who wore their braces as prescribed prevented the need for surgery compared to the group who did not wear their brace. Surgery: When a curve reaches 45-50 degrees, and a child is still growing, surgery is usually recommended because the curve is likely to continue progress. If a curve is over 50 degrees and the child is done growing surgery also may be recommended. This is because when curves are over 50 degrees they tend to increase 1-2 degrees per year for the rest of your life. As curves get larger the amount of lung function tends to decrease which could cause breathing problems later in life. The goals of surgery are to stop the progression of the curve and safely correct any misalignment. This is accomplished by attaching implants (rods, screws, hooks and bands) to the spine. Bone graft is then placed around the implants to encourage the spine to fuse (grow together). This then forms a solid column of bone with metal rods in place, preventing the curve from changing. Most patients are back to their regular sports and activities six months post surgery.