Buscar
-
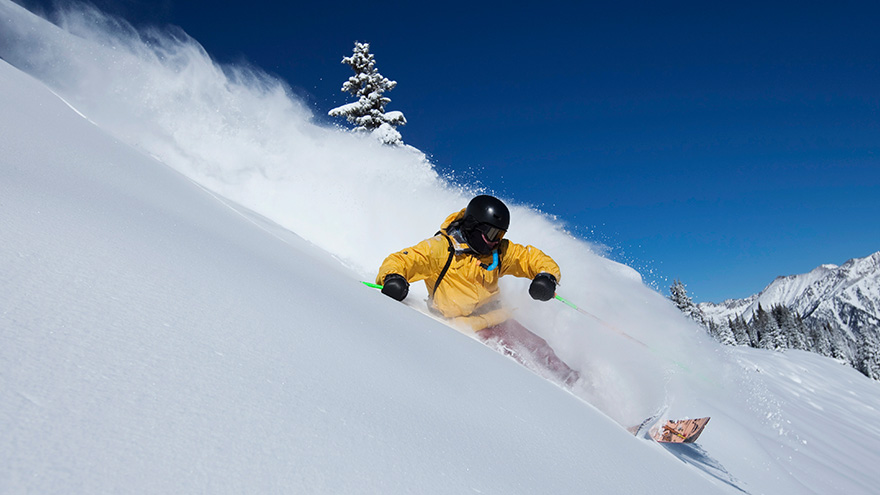
5 consejos de entrenamiento para una temporada invernal épica
Whether it’s cross-country or downhill skiing, snowboarding or snowshoeing, your off-season preparation is vital to an injury-free and healthy experience once the snow starts to fall. We’ve got you covered with expert tips that will make you the king or queen of the hill. Millions of skiers and snowboarders hit the slopes annually. So whether you’re a weekend warrior or stay active year-round, you need to prepare your body for the demands of your favorite winter sport to avoid minor aches, pains or even severe injury. Count on two to three weeks for your body to adapt to the physical challenges ahead if you’re active. Otherwise, give yourself a minimum of six weeks to gear up for the snow. Ready to shred? Here are some conditioning tips to help put you on the path to a fun, successful winter season. 1. Start With Cardio Cardiovascular exercise increases endurance as it conditions the heart, lungs and muscles and provides a solid foundation for other forms of exercise. And when you live and play at altitude, you need even more endurance. “Research shows that our maximum heart rate, cardiac output and ability to exercise are suppressed at altitudes over 5,000 feet,” explains Daniel Staffa, PT, DPT, OCS, of Renown Rehabilitation Hospital. “In the Reno-Tahoe area, altitudes can quickly rise over 8,000 feet when we exercise in the Sierras, so it’s critical to have cardiovascular fitness to avoid associated fatigue and decreased mental alertness on the slopes.” Try this: Pick an aerobic activity you enjoy — speed walking, running, hiking, biking or a cardio machine like the elliptical trainer. Build up to a minimum of 30 minutes, three days a week. 2. Increase Your Strength Your core works overtime to stabilize the body and absorb the shock of pivots and turns and variable snow conditions. Strengthen your core, lower back, hamstrings and calves and you’ll go a long way toward guarding against ligament tears and damage to other joint structures. Stronger muscles will also allow you to relax while maintaining control and making those quick adjustments that uneven terrain demands. Try this: Squats, wall sits and lunges. Work your core and lower and upper extremities with a variation of sit-ups, crunches, back extensions and planks. 3. Integrate Plyometrics Staffa explains that if your legs aren’t used to absorbing the impact of landing, severe injuries can occur. Preempt such trauma with plyometric exercises, or “explosive movements,” that simulate the movements of your favorite sport. You’ll develop greater power in your legs when you combine plyometrics with your strength training. Try this: Incorporate multi-directional drills — such as lateral jumps and forward and backward jumps — on variable surfaces like a trampoline, solid ground, or a box or step. Here’s a challenge for the more advanced: Stand in front of a bench or box (12 inches or so). Jump up and then immediately back down. Do this 10 to 30 seconds at a time, rest and repeat. Or get old school and bust out the jump rope. 4. Improve Your flexibility Flexibility is the ability to move joints through their entire range of motion, from a flexed to an extended position. Being flexible will allow you to pivot, twist and turn and navigate varying snow conditions with ease. You can increase your flexibility while maintaining bone alignment with stretching. Don’t forget to warm up and cool down. Try taking it easy the first 15 minutes of your day on the hill; try starting with a beginner’s run or walk to warm up and prepare your body. Do the same at the end of the day or go for a brisk walk to cool down. Stretching will help return muscles to their normal length. Try this: Dynamic stretches such as leg swings, arm swings and torso twists. Target your quads, hamstrings, calves, and lower back. 5. Fuel for the Hill Staffa suggests loading up on healthy complex carbohydrates the day before you go out and bring along your favorite protein snacks. Assess the slopes before making that first run — is the snow heavy, fresh or wet — and stay mindful of your fatigue level throughout the day. Don’t forget to hydrate and re-hydrate before, during and after exercise. And most important, have fun! Visit Renown Physical Therapy and Rehab for more information. Or call 775-982-5001 to consult with our sports and orthopedic experts who can help you develop an individualized training program in preparation for the winter season, including methods for overcoming previous injuries and limitations.
-

The Risks of Vaping and E cigarettes
In this article reprinted with permission from the Galena Times, Dr. Max J Coppes, Physician-in-Chief, Renown Children’s Hospital, and Nell J. Redfield, Chair of Pediatrics, UNR Med, talk about adolescents vaping, and how an estimated additional 10 million teens are at risk to start using e-cigarettes. What are E-cigarettes? E-cigarettes are battery-operated devices heating a liquid (e-juice) into an aerosol to be inhaled. Breathing in this flavor vapor, which usually contains nicotine, anti-freeze or other cancer-causing chemicals is called ‘vaping.’ There are many forms of these electronic nicotine delivery devices - and they're not always obvious. They not only appear to be cigarettes, cigars, or pipes, but also pass for everyday items, such as flashlights, flash drives or pens. The Effects of Vaping and E-cigarettes Regardless of the nicotine delivery, vaping is addictive and is quickly becoming a public health concern. Nicotine levels in e-cigarettes vary greatly, and they may also contain toxic chemicals. Currently there is a wide range of variability among vaping products. In other words - they deliver different ingredients, hardware, levels of nicotine, and possible toxic chemicals to the user. This makes it challenging to create an overall public health recommendation on their use. Nevertheless, there is no confusion about the harmful effects of the chemicals used in e-cigarettes to the young brain, which develops until age 25. Studies show e-cigarette use serves as an introductory product for teens to go on using ‘regular’ tobacco products. The American Academy of Pediatrics has several recommendations on their use. Such as increasing the minimum age to buy tobacco products, including e-cigarettes, to age 21 nationwide. (Update: nationwide the age as of January 2, 2020 is now 21.) A common misunderstanding with teenagers is the belief e-cigarettes are less harmful than other tobacco products. Moreover, there is a wide range of flavor choices, from mint, mango, crème brûlée to cucumber to attract users. As of September 6, 2019, The Centers for Disease Control and Prevention is reporting over 450 possible cases of lung illness associated with the use of e-cigarette products in 33 states. What Should Parents Know about Vaping? Parents and teachers should know JUUL is a very popular e-cigarette among teenagers, capturing about 68% of the market. JUUL is sleek, small, hides easily, and resembles a flash drive. Surprisingly it charges in an USB port, and can also instantly be mistaken for a real flash drive. One JUUL cartridge contains twice the nicotine found in other e-cigarette cartridges. This roughly equals the amount of nicotine in an entire pack of cigarettes. To repeat, the use of JUUL in young people continues to grow, and this is why parents and teachers need to be aware. Be alert, teach, communicate, and talk to your child about the serious risks of smoking in all forms, whether at home or parties. Tell them how difficult it is to quit and why they should not start. Loving your children is caring; caring for their current and future health and well-being.
-
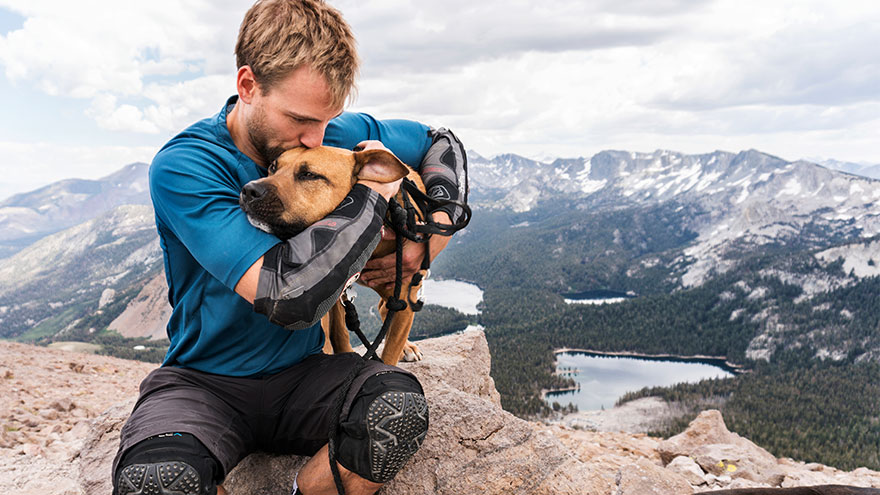
8 Local Hiking Trails You Need to Explore
Need fresh hiking trails? These hiking trails offer new views, a different route or the motivation you need to get outside. Of course, whatever you’re looking for this summer, these trails were made for sunshine in Reno-Tahoe. Easy Hiking Trails Oxbow Nature Study Area Nature Trail Location: 3100 Dickerson Road, at the Truckee River. Parking: There is a parking lot onsite. Time Out and Back: 30 minutes Items to Bring: Water, sunscreen and a hat. Although this loop is just under one mile, it’s the perfect escape in the heart of Reno. And this riverside trail is accessible for all skill levels. Bird watcher? Certainly, keep an eye out for black-crowned night herons, red-shouldered hawks, mule deer, beavers and more wildlife in the area. Tahoe-Pyramid Bikeway – Sections 2 to 4 Location: West Reno to Sparks Parking: Woodland Drive, Crissie Caughlin Park, Idlewild Park, 1st Street, Rock Park and Spice Island Drive. Time Out and Back: 2-4 hours (each section, out and back) Items to Bring: Water, sunscreen and a hat. From west Reno to Sparks, this paved portion of the trail stretches more than 8 miles. And it is easy to find as it runs along the Truckee River. As one of the easiest hiking trails in the region, it includes numerous parking access points and you can walk as long or short as you desire. In particular, one great route is from Rock Park on S. Rock Boulevard to Cottonwood Park on Spice Island Drive in Sparks. It’s an easy walk for all hiking levels. Notably many evening hikers explore this area to view the bats living under the McCarran Bridge. Additionally, an array of birds and river views can also be found along this enjoyable path. For maps for sections of this path, visit Tahoe-Pyramid Bikeway’s website. Cave Rock Hiking Trail Location: South Lake Tahoe; turn right on Cave Rock Drive from Highway 50, just prior to the tunnel. Parking: Park on Cave Rock Drive. Time Out and Back: 30 minutes Items to Bring: Water and sunscreen. Not only does this short trail have breathtaking views of Lake Tahoe, but it is also meaningful. Chiefly the rock was created more than three million years ago. Equally important, it is still considered sacred to the Washoe Native Americans. Also, leashed dogs are welcome on the trail. Moderate Hiking Trails Steamboat Ditch Trail Location: To get to the trailhead, take Mayberry Drive in west Reno. Then turn south on Plateau Road and right onto Woodchuck Circle. Parking: There is a dirt area for limited parking. Time Out and Back: 3-5 hours Items to Bring: Water, layers, sunscreen and a hat. Of all the hiking trails listed, this one offers some of the best views of downtown Reno and the surrounding hillsides. Built by Chinese laborers in the late 1870s, the Steamboat Ditch is the longest ditch in the Truckee Meadows region. In fact, the water serves as a vital source for ranchers and farmers south of Reno. First, start behind the Patagonia in northwest Reno at the Tom Cooke Trail or park off of Woodchuck Circle. Next head west to find the “Hole in the Wall.” Surprisingly this is a tunnel engineered through the hill, so the ditch could supply water to the Truckee Meadows. This hike is a little over 8 miles with the halfway point just under 4½ miles. With this in mind, if you’re thinking of hiking with your four-legged friend, remember to bring your leash because rattlesnakes can be spotted. Usually there’s also little shade, so plan accordingly by bringing a hat and dressing in layers. Thomas Creek Trail Location: Head out on Mt. Rose Highway going west to Timberline Road. Then drive 1.3 miles past the end of the pavement, stay on Timberline and you will see the trail head on your left shortly after you cross the bridge. Parking: There is a paved parking area on Timberline Drive. Time Out to Back: 2-6 hours Items to Bring: Water, layers, food and a phone with GPS or map. Definitely put he Thomas Creek Trail on your hiking trails list. Located off of Mt. Rose Highway, it is a very scenic hike winding along Thomas Creek into a Jeffrey pine forest. You may choose to hike to what appears to be the end of the trail (where it meets the road) or continue further up for 1/8 of a mile into the Mt. Rose Wilderness. Hiking up the trail to the creek crossing, and then taking the dirt road back down is a great way to see the entire canyon. While this hiking trail is closer to 5 miles, it can be shortened by turning around at any point. Another option is to look for signs to turn off the Thomas Creek Trail at the junction for Dry Pond Loop. Dry Pond is a 4½-mile, out and back hiking trail from the Timberline parking lot. Ultimately you may see a pond or hilltop meadow, depending on the season and weather. Overall it is possible to go anywhere from 2 to 6 miles (or more), based on what you choose to hike. The gain along the creek is minimal, with an 800-foot gain at the top part of the trail. In particular, watch for mountain bikers, as this is also a very popular biking trail. Hunter Creek Trail Location: Go west on Mayberry Drive to Plateau Road. Then turn left and go up the hill to Woodchuck Drive. Lastly, turn right and follow Woodchuck to the hiking trail head. Parking: Paved parking on Woodchuck Drive with a bathroom and benches. Time Out and Back: 2-5 hours Items to Bring: Water, layers, a snack, sturdy shoes and sunscreen. The Hunter Creek trail is about a 7-mile day hike with a little over 1,000 feet of overall gain leading to a waterfall. Ultimately it’s totally worth the trip! This hiking trail winds up Hunter Canyon through sagebrush, Jeffrey pines and interesting rock formations. The waterfall is a great place to sit on shaded logs and enjoy lunch. This trek is very rocky and narrow at times, so good trail shoes are recommended. Furry friends should also be leashed, as rattlesnakes and wildlife are common along the trail. Difficult Hiking Trails Hidden Valley Loop Location: Hidden Valley Regional Park; drive east on Pembroke Drive and turn left on Parkway Drive. The park is at the end of the road. Parking: Park on the east side of the park, closest to the hills. Time Out and Back: 3-6 hours Items to Bring: Water, sunscreen, shoes with good traction and a lunch or snack. Overall this 6-mile loop has about 1,800 feet of gain and is located east of Hidden Valley. We recommend starting the hike from Hidden Valley Regional Park. First, head southeast on a dirt road and then turn east onto a very steep trail that winds over red dirt for about a half mile. In fact, this is the steepest part and it’s a leg burner. Once you get past the climb, the trail gradient decreases. Then you wind along the south side of a big bowl lined with pinyon pine and juniper trees. The hiking trail continues up to the ridge line where there are incredible views of the Truckee Meadows and Mt. Rose. You can hike back down from this point, but it is best to continue on the trail along the ridge line to where it isn’t as steep with incredible views. Frequently you may see wild horses while hiking in this area. Mount Tallac Location: Southwestern side of Lake Tahoe, between Emerald Bay and Camp Richardson. Turn south on Mt. Tallac Road from Highway 89. Parking: Follow Mt. Tallac Road to the parking lot. Time Out and Back: 6 hours Items to Bring: Water, layers, lunch or snacks, sunglasses, hat, sturdy shoes and sunscreen. Definitely a big hike with an even bigger reward — an incredible view of the Desolation Wilderness and Lake Tahoe. This hiking trail is 10.5 miles out and back with a 3,500-foot elevation gain. If you’d like to explore the area without the 6-hour commitment, hike 1.7 miles out to Floating Island Lake or 2.3 miles out to Cathedral Lake. Day use permits are required and you can fill one out for free at the trailhead.
-

How to Safely Store Breast Milk
Breast milk. It's often referred to as liquid gold. And fortunately, it can be safely refrigerated or frozen for later use, which can allow you to be a bit more flexible in your new routine with baby. Whether you're getting ready to return to work, planning for the chance date night out or just exclusively pumping, it's crucial to understand the guidelines for proper breast milk storage. Storing Breast Milk Use clean bottles with screw caps, hard plastic cups that have tight caps or nursing bags (pre-sterilized bags meant for breast milk). Be sure to label each container with the date the milk was pumped and your baby's name if the milk is going to childcare providers. You can add fresh, cooled milk to milk that is already frozen, but add no more than is already in the container. For example, if you have two ounces of frozen milk, then you can add up to two more ounces of cooled milk. For healthy full-term infants, milk can be stored as follows: Room temperature - six to eight hours (no warmer than 77°F, or 25°C). Refrigerator - up to five days at 32°-39°F (0°-3.9°C). Freezer– Varies depending on freezer type. Up to two weeks in a freezer compartment located within the refrigerator. Three to six months in a freezer that is self-contained (standard kitchen fridge/freezer combination) and kept at 0°F (-18°C). Breast milk should be stored in the back of the freezer and not in the door. Six to 12 months in a deep freezer that is kept at -4°F (-20°C). Be sure to leave about an inch of space at the top of the container or bottle to allow for expansion of the milk when it freezes. Thawing Breast Milk Place frozen breast milk in the refrigerator to thaw (about 24 hours) then warm by running warm water over the bag or bottle of milk and use it within the next 24 hours. If you need it immediately, remove it from the freezer and run warm water over it until it's at room temperature. Never microwave breast milk and do not refreeze it. Once your baby has started to drink from the bottle, you should use it within one hour. You may find that different resources provide different recommendations about the amount of time you can store breast milk at room temperature, in the refrigerator and in the freezer. Talk to your doctor or lactation consultant if you have any concerns or questions.
-
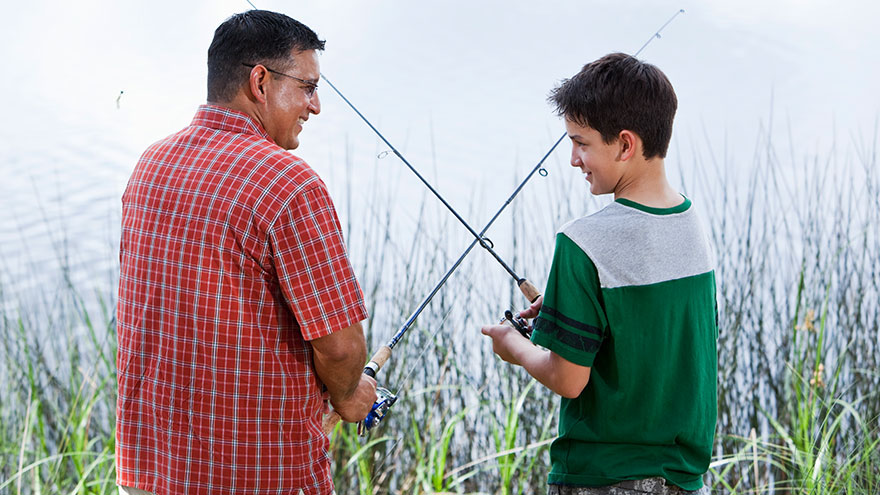
Get Reel: Top 5 Fishing Spots in the Truckee Meadows
Fishing can be great for relaxation, and it’s a great family activity. Here are five suggestions for great local fishing spots, plus a recipe for trout if you wind up catching one! There are many ways to unwind in the great outdoors in our beautiful region, and fishing can be easily added to that list. The benefits of casting a line are many. According to a study by Harvard Medical School, fishing was compared to yoga for its links to stress relief. The study notes that fishing brings out the relaxation response that slows down breathing, reduces blood pressure and relaxes the muscles. So, get out there and find some fish. There are many lakes of many styles to practice this ancient art, but here are the five that keep coming up in local conversation, virtual or otherwise. If you want to explore more options, the Nevada Department of Wildlife’s fishing guide can fill you in (and then some!). One thing to note about two of the areas we’ve chosen, Pyramid Lake and the Truckee River. Winter flooding has led regional officials to make necessary repairs to both areas, and there may be restrictions to access, including roads that lead to some of the fishing areas in both of these large bodies of water. Be sure to check first at the sites below before heading out, and you can also go to the flood advisory page for our region on water.weather.gov to check on flooding advisories throughout the summer as snowmelt continues. Five Great Regional Fishing Spots Boca Reservoir Location: Stampede Dam Road, 2 miles north of the Boca exit on Interstate 80 Two types of fish: rainbow trout, kokanee salmon More details: One of the more reliable year-round spots, Boca Reservoir even hosts ice fishing once (or if) the body of water freezes over. It’s located in the beautiful Tahoe National Forest. Donner Lake Location: Take the Donner Pass Road exit from Interstate 80, turn onto South Shore Drive Two types of fish: brown trout, mackinaw trout More details: A great scenic lake at the edge of Donner Memorial State Park, this fishing spot includes a public pier, while its China Cove on its southeast end is also a good place for mackinaw in the fall. Paradise Park Ponds Location: Take US Highway 395 to the Oddie Boulevard exit, follow it about a mile to the corner of Oddie and Silverada boulevards Two types of fish: rainbow trout, channel catfish More details: The Reno-Tahoe area has several urban lakes ripe for fishing, including this longtime spot for anglers. There are two large and two small ponds for a fun experience no matter your skill level. It’s also open year-round. Pyramid Lake Location: Interstate 80 to the Fernley exit, then take the Wadsworth/Pyramid Lake ramp to State Highway 447 Two types of fish: cutthroat trout, Sacramento perch More details: This is one place everyone talks about for fall fishing, as the season, which opens on Oct. 1, is very popular. The lake is run by the government of the Paiute Tribes and has distinctive rules for those who choose to fish here. Truckee River Location: Along Highway 89 and Interstate 80, between Tahoe City limits and Reno city limits Two types of fish: rainbow trout, mountain whitefish More details: This portion of the Truckee is where most of the fishing takes place, although the Reno-Sparks Recreation and Visitors Bureau notes that “this is not a river to fish to death in one spot. There is plenty of room and one should keep moving until one finds some agreeable fish.”
Read More About Get Reel: Top 5 Fishing Spots in the Truckee Meadows