Buscar
-
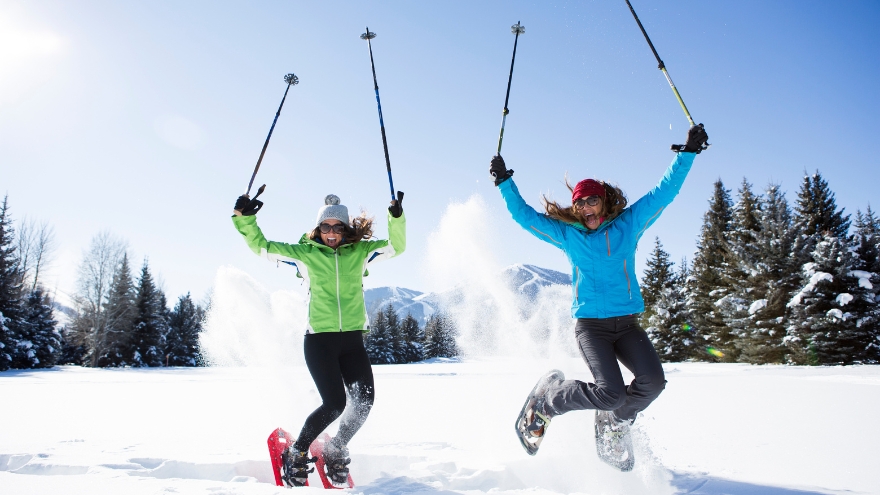
The Unmatched Health Benefits of Snowshoeing
Snowshoeing is an excellent winter workout that can help burn calories, strengthen muscles and boost cardiovascular health. Explore the top 8 snowshoeing spots and experience this ultimate workout adventure! Significant Health Benefits: Exceptional cardiovascular workout – burn up to 1,000 calories per hour! Low-impact muscle building Endurance building Balance strengthening and agility Improves your sense of well-being by connecting to nature Prepping for Your Adventure There are some crucial details to think about when it comes to snowshoeing, especially if you are a beginner. Make sure to pick the right kind of footwear to go on top of your snowshoes; a pair of comfortable waterproof boots are a great choice and remember to wear lots of layers. Several local places rent snowshoes if you aren’t sure about spending money on a pair. Check out Bobos Ski and Board Patio or our local REI Co-Op. Check out REI’s Beginner’s Guide to Snowshoeing for reference. 8 Cool Snowshoeing Spots 1. Galena Creek Park Close to Reno, this beautiful, low-altitude park offers several trails. You’ll find various creeks and streams under cover of pristine ponderosa pines. From beginner to advanced, the differing trail systems provide a challenge for everyone! Head west on State Route 431 (Mt. Rose Highway) for about seven miles until you see the park sign on the right side of the highway. 2. Tahoe Meadows – Chickadee Ridge This local favorite not only gives fantastic views of Lake Tahoe but the best part? – friendly little chickadees will eat seeds right out of your hand! Be sure to pack plenty of sunflower birdseed, as that seems to be their favorite. From the trailhead parking lot, head southeast into the open meadow. Then follow the ridgeline to your right (southwest). Continue southwest up toward the top of the ridgeline to the west, and you’ll get to Chickadee Ridge in just under two miles. 3. Spooner Lake Trail The easy 2.5-mile loop around Spooner Lake is excellent for all skill levels. This alpine lake is surrounded by aspen trees which house varied bird species, so bring your binoculars! Dogs are allowed on a leash, and all-day parking is $10. 4. Kirkwood Ski Resort You’ll need a trail pass, but this South Lake Tahoe resort has various routes from beginner to advanced, with roughly 50 miles of terrain. Nighttime snowshoe treks during the full moon are also available throughout the winter. Kirkwood is located on Highway 88, close to Carson Pass. 5. Camp Richardson Heading north, you can find this well-established and favorite local snowshoeing spot. If you’re up for an adventure, you can trek up to Fallen Leaf Lake. It’s located off Highway 89 and near Fallen Leaf Road. 6. Dry Pond Loop This moderate, 6.5-mile loop near Washoe Valley has impressive views of Carson Valley, Washoe Lake, and the Mt. Rose Wilderness. If you like the sound of rushing water, most of the trail meanders along White’s Creek. This area is dog-friendly and kid-friendly, which makes it a family favorite. 7. Royal Gorge Soda Springs is home to this resort, which is well known for its cross-country skiing trails. Enjoy extensive trails leading deep into the trees with spectacular views. Find Royal Gorge from the Soda Springs exit on West Interstate 80. 8. Ash Canyon Creek Tucked away in the Carson Valley, these trails are filled with mountain bikes in the spring and provide excellent snowshoeing trails in the winter. Find it from Interstate 580 by taking the Highway 395 Business exit to Winnie Lane.
Read More About The Unmatched Health Benefits of Snowshoeing
-

How to Treat a Sprain or Strain
Injuries happen to everyone. They are caused by participating in sports, recreational activities like hiking, and even by accidentally stepping off a curb wrong. If you experience a sprain or strain, the first few days are often the most painful. Renown Sports Medicine physicians Luis Palacio, MD and Brandon Hockenberry, MD walked us through what to do after an injury. Listen to Your Body See a medical professional right away if: You know or suspect that a bone is broken You are having difficulties putting full weight on a joint of the leg Pain or swelling is severe There is a sign of an infection, such as redness and warmth in the joint The First 24-72 Hours Joint sprains tend to swell more than muscle strains. You can use ice as needed for comfort and to relieve any pain, but do not use ice for more than 15-20 minutes at a time. Ice and NSAIDs (such as ibuprofen) can help prevent excessive swelling and mask the pain, but they do not speed recovery. Some research shows that overuse of ice actually delays recovery. During the first 24-72 hours, your injury will go through an inflammation phase. Inflammation is your body’s natural way to dispose of dead tissue cells, build new healthy structures, and hopefully heal even stronger than before.
-

Top 5 Health Benefits of Pickleball
Over the past couple of years, pickleball has become the fastest-growing sport among people of all ages. It’s a combination of tennis, ping-pong and badminton that originated in 1965. This sport can be played indoors or outdoors on a pickleball court where two players (singles) or four (doubles) hit a perforated hollow plastic ball over a 36-inch-high net using solid-faced paddles. A pickleball court is the same size as a double’s badminton court and measures 20×44 feet. Pickleball is a fun, low-impact game that keeps people healthy and active. Kaitlyn Jacobson, Physician Assistant at Renown Urgent Care – Ryland, plays pickleball herself and is a big fan of the sport. Here she shares the top five health benefits of playing pickleball.
-

How to Manage and Prevent Tendonitis
Tendonitis occurs when a tendon in your body is inflamed or irritated. This painful condition can impact your day-to-day activities, but can be managed and prevented. Luis Palacio, MD, shared some insights into how to manage tendonitis. Overuse and Repetitive Motion Tendons are complex tissues in our body that connect muscles to bones, allowing us to move. Unfortunately, sometimes these tendons become inflamed, worn down or injured, a condition called tendonitis. Symptoms of tendonitis include pain or dull ache, tenderness and mild swelling at the site. While tendonitis can be caused by a sudden injury, it is more commonly seen in frequent motions, including: Repetitive motions in exercise, work or other physical activities. Awkward positions in a movement, including poor posture. Forced movements that strain your body. Sudden increase in frequency of movement or level of difficulty, including little to no recover time between new activity. Shoes without proper support or hard surfaces, such as concrete floors. Evaluation is Key If you suspect that you have tendonitis and it does not resolve on its own after a few days, you should get it evaluated by a primary care or sports medicine doctor. They can make recommendations to aid your recovery and refer you to the right sub-specialist if needed. With some intentional actions, you can help reduce the risk of tendonitis with the following suggestions: Add variety: Mixing up the type of exercise you do will help prevent repetitive motions that can result in overuse. Stretch and condition: Make sure the keep up with proper stretching and muscle strengthening to support your physical activities. Do it right: Make sure that the way you are completing exercise or work-related physical activities is correct. Seek out a professional for lessons or guidance if you are unsure.
-

How to Spot the Signs of a Concussion
Concussions are an unfortunate occurrence in youth sports and other physical activities. Learning the signs now will help you respond if you suspect that someone near you has suffered a concussion. A concussion is a mild type of traumatic brain injury (TBI) that can occur after any injury to the head/neck area. It’s important to seek the appropriate level of care if they occur. Brandon Hockenberry, MD with Renown Sports Medicine shares tips on concussion signs to look for and what to do next. Look for these Dangerous Signs First Call 911 or visit an ER right away if you notice one of the following in the person who suffered a blow to the head or body: One pupil is larger than the other Severe or worsening headaches Drowsiness or inability to wake up, including any period of unconsciousness Slurred speech, weakness, numbness or decreased coordination Multiple episodes of vomiting Convulsions, shaking or twitching Monitor for Concussion Signs and Symptoms If someone suffers a bump, blow or other jolt, it’s important to look out for changing symptoms. Symptoms can continue to evolve for up to 24 hours after the injury. Seek care from your primary care provider, an urgent care or a sports medicine provider if you notice any of the following: Cannot recall events prior to or after the incident Appears confused or disoriented Clumsy movements Slow reaction, including movements and speech Changes to normal behavior or mood You should also question the person about how they are feeling. If they report any of the following symptoms, seek care: Headache or feelings of pressure in their head Nausea or vomiting Dizziness or balance issues Problems with eyesight, such as blurriness or double vision Increase sensitivity to light or sound Sluggishness, or feelings described as “hazy” or “foggy” Struggles with remembering or concentration Just “not feeling right”
-

Senior Care Plus Loves Pickleball
Senior Care Plus is pleased to announce we are now a proud sponsor of Jam On It Pickleball, open to the community seven days a week at the Reno Sparks Convention Center. We’re excited to help promote this fun activity to our members, employees and the public. Pickleball has many wonderful health benefits – particularly for seniors. It’s a low-impact game that raises the heart rate, improves hand-eye coordination and increases mobility. In addition to the obvious physical benefits, pickleball is a great social activity. Getting out of the house and playing a fun, easy-to-learn game with others is a great way to make new friends while improving your physical and mental health! Ralph Barbato, a Senior Care Plus member from Reno, is a huge fan of pickleball and all it has to offer. “Pickleball has made such a positive impact on my life. I love the physical and mental health benefits along with the social aspect – it’s a great way to meet new people and I’m excited to have it in our community,” said Ralph.
-
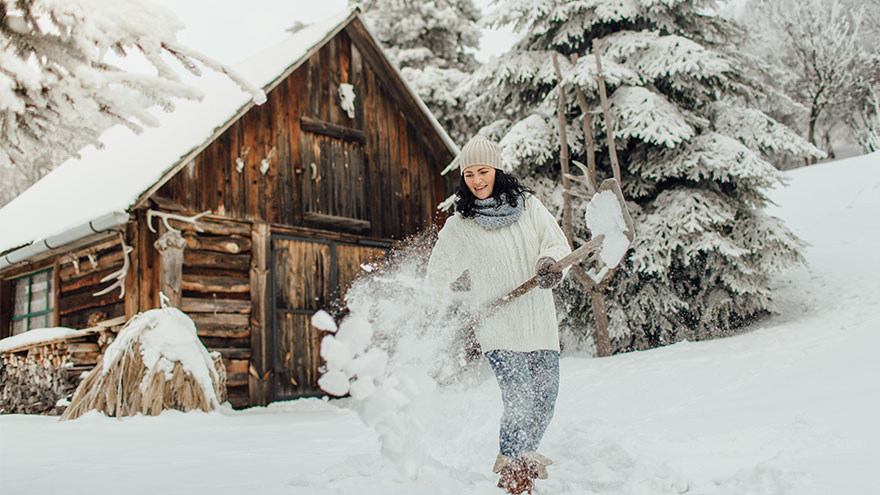
6 consejos para palear la nieve de manera segura
While the appearance of a winter wonderland in your yard can be a welcome one, an accompanying aspect is not: the idea of clearing your driveway and sidewalks. The sometimes-daunting task of snow shoveling is a repetitive activity that can cause muscle strain to the lower back and shoulders. However, by following the tips below, you will spend more time appreciating your winter wonderland -- when your sidewalk and driveway are all clear, that is. But, we all know that injuries happen, and if you do find yourself with back pain that does not resolve in a few days, contact your primary healthcare provider, or visit a Renown Urgent Care. Another way to avoid injury during strenuous activity, or help heal an injury that won't go away, is to work with a physical therapist who can offer at-home exercises to keep your body strong. 6 Tips for Safe Snow Shoveling Following these tips from the American Physical Therapy Association can help you avoid injuries: Lift smaller loads of snow, rather than heavy shovelfuls. Be sure to bend your knees and lift with your legs, rather than your back. Use a shovel with a shaft that lets you keep your back straight while lifting. A short shaft will cause you to bend more to lift the load. Using a shovel that’s too long makes the weight at the end heavier. Step in the direction where you are throwing the snow to prevent the low back from twisting to help prevent “next-day back fatigue.” Avoid excessive twisting because the spine cannot tolerate this motion. Bend your knees and keep your back as straight as possible so that you are lifting with your legs. Take frequent breaks when shoveling. Stand up straight and walk around periodically to extend the lower back. Backward bending exercises while standing will help reverse the excessive forward bending of shoveling. Stand straight and tall, place your hands toward the back of your hips and bend slightly backward for several seconds. When in doubt, ask for help. The Reno community is a generous one and you can typically find snow shovelers for hire on local message boards like Nextdoor and Facebook. Or, if you have a kid in your neighborhood, they might be looking to make some extra money on a snow day.
-

Top Safe Sleep Tips for Your Baby
Becoming a parent for the first time means lots of new unknowns – from learning to breastfeed and swaddle to buckling your newborn into the car seat for the first time. But when it comes to putting them to bed safely, it’s important to remember it really can mean life or death. It’s something we’re taught before our little one is even here: the correct way to put your baby to bed safely. Sadly though, the number of infant deaths continues to climb. The main culprit of sleep-related infant death continues to be all the items parents leave in the crib with their babies. According to the Center for Disease Control and Prevention, there are about 3,500 sleep-related deaths among babies each year. “The best advice is ‘bare is best.’ Keep your infant’s sleep space clutter free – no blankets, bumpers, toys or pillows,” said Karen Wagner, Pediatric Nurse Practitioner. Follow the ABCs for Safe Sleep Remembering the ABCs is an easy way to remember how to put your little one to bed safely. A: Alone No blankets, toys or pillows. “We do recommend using a sleep sack as a blanket alternative,” said Karen. “It prevents the risk of suffocation and keeps your baby warm.” Keep in mind, the greatest risk for suffocation happens when babies are under 1 year of age, so it’s best to save the toys, blankets and pillows for their “big kid bed,” or around 18 months old. B: Back The slogan “back is best” is another good reminder. Keeping your baby on their back until they’re old enough to rollover helps reduce the risk of Sudden Infant Death Syndrome (SIDS). C: Crib It is best to have your baby sleep alone in their crib. While co-sleeping may be enticing, especially after a late-night feed, it increases the risks of possible suffocation. However, “having your child in your room, in their own crib or bassinet, is protective for SIDS,” Karen said. “In fact, we think co-rooming reduces SIDS risk by almost 50 percent.” Co-rooming allows parents to keep new babies in close reach and helps parents oversee their baby’s sleep, just in case something happens.
-

Emergency Hiking Kit Essentials
With the help of Aaron Bertalmio, MD of Renown Urgent Care, we're sharing nine essential must-have items for your hiking emergency kit. 9 Essential Items For Your Hiking Emergency Kit With more than 300 days of sunshine in Reno-Tahoe and plenty of trails to explore, you'll want to keep these essential items in your kit. 1. Water Surprisingly, this no-brainer, however, is often overlooked. Bring enough water to last for the entire adventure. This amount of water can be heavy depending on the distance, altitude or intensity. With this in mind, the next best bet is to filter or purify water from a lake or stream. Here's how: You can do this with iodine or chlorine dioxide tablets, charcoal or an ultraviolet light wand. Tip: Look for water that is moving or rushing over rocks. Having enough water or filtration cannot be underestimated. "If you become injured and need to wait for help, you can only last about three days without water," Dr. Bertalmio says. 2. Food Meals-Ready-to-Eat (MREs) or dehydrated food pouches are essential, ensuring you have plenty to eat if you're outdoors longer than expected. 3. Maps Bring a printed map, compass or GPS. You can't always rely on your smartphone, so this is the perfect backup plan. 4. First-Aid Supplies Your hiking first-aid kit should change based on the type of hiking. As a basic rule, keep the following items in your pack: Fever/pain reliever Sewing kit with safety pins Tweezers Bandages and moleskin Antibiotic ointment Duct or medical tape Whistle 5. Light Source Wear or pack a small headlamp to illuminate the way if you get caught outside after sunset or in a poorly lit area. Headlamps are also great in emergencies because they are hands-free. 6. Emergency Shelter Even if you're only going out for the day, pack a low-weight emergency blanket for the trip. In other words, if the day trip turns into an overnight adventure, the blanket will keep you warm and alive in the event of cold temperatures. 7. Fire Starter Pack small tools in your hiking emergency kit to ensure an easy fire start. Waterproof matches, a knife, a lighter, or a strike fire starter are great options. Tip: Bring a multi-tool, including a knife and scissors that can be used for first-aid. 8. Layers of Clothing Mother Nature likes to change her mind in northern Nevada, and temperatures vary significantly within 24 hours. Therefore, pack a compact, lightweight waterproof and windproof jacket. This will protect you from being uncomfortably chilly and experiencing hypothermia. "Hypothermia is when your body temperature drops to a dangerously low level. You want to avoid this completely by keeping body temperature regulated outdoors and avoiding cold water immersion," says Dr. Bertalmio. 9. Sun Protection Certainly, sun protection should be part of your daily routine and an essential in your hiking emergency kit. You'll want to bring enough sunblock to reapply in direct sunlight and layers to cover exposed skin every two hours. Dr. Bertalmio reminds everyone the sun is intense in northern Nevada. "The higher altitude means an increased risk of sun-induced skin damage," he explains. "Some trails can reach above 10,000 feet, and at that altitude, UV radiation could be 35 to 45 percent more intense than at sea level."
-
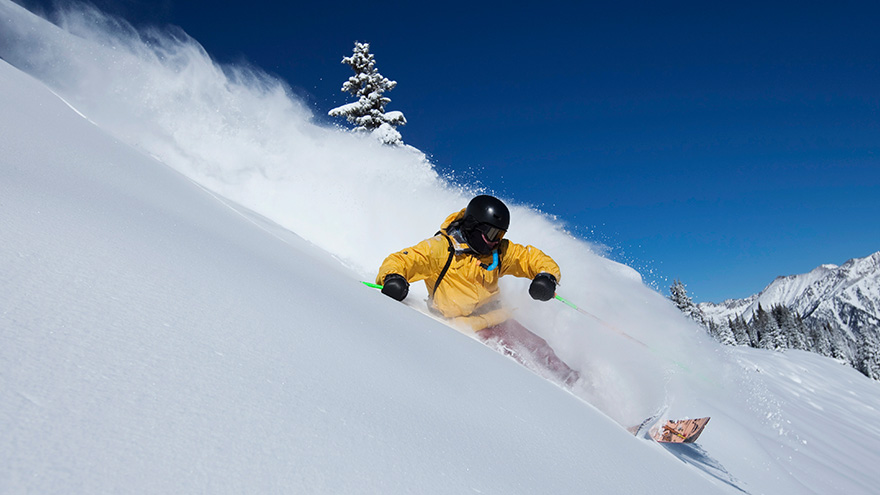
5 consejos de entrenamiento para una temporada invernal épica
Whether it’s cross-country or downhill skiing, snowboarding or snowshoeing, your off-season preparation is vital to an injury-free and healthy experience once the snow starts to fall. We’ve got you covered with expert tips that will make you the king or queen of the hill. Millions of skiers and snowboarders hit the slopes annually. So whether you’re a weekend warrior or stay active year-round, you need to prepare your body for the demands of your favorite winter sport to avoid minor aches, pains or even severe injury. Count on two to three weeks for your body to adapt to the physical challenges ahead if you’re active. Otherwise, give yourself a minimum of six weeks to gear up for the snow. Ready to shred? Here are some conditioning tips to help put you on the path to a fun, successful winter season. 1. Start With Cardio Cardiovascular exercise increases endurance as it conditions the heart, lungs and muscles and provides a solid foundation for other forms of exercise. And when you live and play at altitude, you need even more endurance. “Research shows that our maximum heart rate, cardiac output and ability to exercise are suppressed at altitudes over 5,000 feet,” explains Daniel Staffa, PT, DPT, OCS, of Renown Rehabilitation Hospital. “In the Reno-Tahoe area, altitudes can quickly rise over 8,000 feet when we exercise in the Sierras, so it’s critical to have cardiovascular fitness to avoid associated fatigue and decreased mental alertness on the slopes.” Try this: Pick an aerobic activity you enjoy — speed walking, running, hiking, biking or a cardio machine like the elliptical trainer. Build up to a minimum of 30 minutes, three days a week. 2. Increase Your Strength Your core works overtime to stabilize the body and absorb the shock of pivots and turns and variable snow conditions. Strengthen your core, lower back, hamstrings and calves and you’ll go a long way toward guarding against ligament tears and damage to other joint structures. Stronger muscles will also allow you to relax while maintaining control and making those quick adjustments that uneven terrain demands. Try this: Squats, wall sits and lunges. Work your core and lower and upper extremities with a variation of sit-ups, crunches, back extensions and planks. 3. Integrate Plyometrics Staffa explains that if your legs aren’t used to absorbing the impact of landing, severe injuries can occur. Preempt such trauma with plyometric exercises, or “explosive movements,” that simulate the movements of your favorite sport. You’ll develop greater power in your legs when you combine plyometrics with your strength training. Try this: Incorporate multi-directional drills — such as lateral jumps and forward and backward jumps — on variable surfaces like a trampoline, solid ground, or a box or step. Here’s a challenge for the more advanced: Stand in front of a bench or box (12 inches or so). Jump up and then immediately back down. Do this 10 to 30 seconds at a time, rest and repeat. Or get old school and bust out the jump rope. 4. Improve Your flexibility Flexibility is the ability to move joints through their entire range of motion, from a flexed to an extended position. Being flexible will allow you to pivot, twist and turn and navigate varying snow conditions with ease. You can increase your flexibility while maintaining bone alignment with stretching. Don’t forget to warm up and cool down. Try taking it easy the first 15 minutes of your day on the hill; try starting with a beginner’s run or walk to warm up and prepare your body. Do the same at the end of the day or go for a brisk walk to cool down. Stretching will help return muscles to their normal length. Try this: Dynamic stretches such as leg swings, arm swings and torso twists. Target your quads, hamstrings, calves, and lower back. 5. Fuel for the Hill Staffa suggests loading up on healthy complex carbohydrates the day before you go out and bring along your favorite protein snacks. Assess the slopes before making that first run — is the snow heavy, fresh or wet — and stay mindful of your fatigue level throughout the day. Don’t forget to hydrate and re-hydrate before, during and after exercise. And most important, have fun! Visit Renown Physical Therapy and Rehab for more information. Or call 775-982-5001 to consult with our sports and orthopedic experts who can help you develop an individualized training program in preparation for the winter season, including methods for overcoming previous injuries and limitations.
-

What Foods to Eat and What to Avoid When Pregnant
Eating a well-balanced and nutritious diet when pregnant is one of the more essential things you can do for your baby and yourself. The basic principles of what to eat when pregnant are quite similar to how we should be eating all the time. This includes focusing on fruits, vegetables, whole grains, lean protein and healthy fats. Of course, there are a few areas that you should pay close attention to when you’re pregnant and a few foods you should avoid. We consulted Renown Health’s Caitlin Bus, RD, LD, CDE to learn more about pregnancy nutrition. Foods to Eat Regularly: Veggies Vegetables of all kinds -- and in all forms -- are beneficial for you and your baby during pregnancy. Veggies ensure your body is getting the fiber, vitamins and minerals it needs. However, fresh or frozen veggies are considered best, but if you choose to eat canned veggies, make sure you choose a low sodium product. The more greens, the better! If you have an aversion to vegetables, especially in the first trimester, try sneaking them into smoothies. Healthy Proteins Protein-rich foods support your baby's growth while giving your body the nutrients to build and repair tissues, including your muscles, hair, skin and nails. Although protein requirements vary from person to person, a pregnant woman needs additional protein for her baby's growth, especially in the second and third trimesters. Regularly eating high protein foods -- like fish, chicken, turkey, eggs, peanut butter, nuts and beans –– promotes your baby's healthy brain and heart development. Grains Food like brown rice, quinoa, whole-wheat pasta and oatmeal are great to eat while pregnant. They are rich in fiber, iron, B vitamins and folic acid, which are all beneficial to physical development. Grains also help alleviate constipation and hemorrhoids. Fruits Fruit can help satisfy any sugar cravings you have when pregnant while also supplying your baby with nutrients – it's a win-win. Some people advise against fruit consumption while pregnant, but this is a myth. Like with all foods, moderation is key. Fruit can be high in sugar, so it is important to be aware of your intake. Also, make sure you are mindful of your preparation – thoroughly rinse produce under running water for 30 seconds to help avoid foodborne illness. Pasteurized Dairy Dairy products like milk, cheese and yogurt can be great sources of protein and calcium needed for the healthy development of a baby's bones, teeth and muscles. These foods also help with ensuring healthy heart function and nerve transmission. When buying these products, make sure to choose pasteurized products to avoid exposing your body to germs and bacteria. The American College of Obstetrics and Gynecology recommends 1,000mg of calcium per day for pregnant and lactating women. This equates to 4 servings of dairy or calcium-rich foods such as leafy greens, broccoli, tofu, almonds or dried figs. DHA Omega-3 Fats Omega-3s like DHA help support the health of a baby's brain and parts of their eyes. Women who are pregnant or breastfeeding should eat at least 8 ounces and up to 12 ounces of seafood each week. Ideally, food sources that offer DHA omega-3 and that are lower in mercury should be emphasized in your diet, including fish like salmon, sardines and anchovies. If you do not eat fish or omega-3 fortified foods, a DHA omega-3 supplement is recommended. Choline Did you know that 92% of pregnant women fail to meet the daily choline recommendation? Choline is crucial for an infant's brain and central nervous system development. One egg supplies 33% of the recommended daily intake. Although choline is often absent or low in prenatal vitamins, the best food sources include eggs, meats, fish, dairy, navy beans, Brussels sprouts, broccoli and spinach. Iron and Folic Acid Iron is the most common nutrient deficiency during pregnancy. Foods with high and moderate amounts of iron include red meat, chicken, fish, fortified cereals, spinach and beans. Folic acid is used to make the extra blood your body needs during pregnancy. Consuming adequate folic acid early in pregnancy reduces the risk of birth defects that affect the spinal cord. It is recommended to consume 400 micrograms (mcg) per day for pregnant women. This amount is included in your prenatal vitamins. Water Staying hydrated is one of the best things you can do for yourself and your baby when pregnant. In addition to just being good for you, hydration alleviates morning sickness and nausea, while dehydration can lead to contractions and even pre-term labor. Aim for 10 cups of fluids per day, on top of the water naturally occurring in foods. Foods to Avoid: Raw Fish and Fish with High Mercury Content Sorry sushi fans, according to the Center for Disease Control and Prevention, pregnant women are 10 times more likely to get infected by Listeria, a bacteria found in raw or undercooked fish. Also, avoid fish often found to be high in mercury, including swordfish, king mackerel, tuna and marlin. Processed or Raw Meat Similar to eating raw fish, eating undercooked or raw meat increases your risk of infection while pregnant. Hot dogs and lunch meats should also be avoided, unless they have been reheated to be steaming hot (for example, in a microwave). Alcohol Drinking alcohol when pregnant can impact your baby’s brain development and increases your risk of premature birth, low birth weight or miscarriage. Just don’t do it! Minimize Caffeine High caffeine intake during pregnancy can restrict your baby’s growth; therefore, it is recommended that pregnant people limit their caffeine intake to less than 200 mg per day – that’s roughly two cups (16 fl oz) of coffee per day. Runny Eggs Eating raw or runny eggs when pregnant increases your risk of Salmonella, which can cause fever, nausea, vomiting, stomach cramps and diarrhea. Always make sure your eggs are cooked through or use pasteurized eggs.
Read More About What Foods to Eat and What to Avoid When Pregnant
-

La lactancia no tiene por qué significar dolor en los pezones
If you think sore nipples are just a normal part of breastfeeding, think again. Robin Hollen, APRN, and Breastfeeding Medicine Specialist, says that nursing can be an enjoyable experience for mom and baby without pain and discomfort. A top concern of nursing moms within the first week after delivery is how to prevent sore nipples. Even moms who’ve nursed before struggle with this common issue. While many women think it is a regular part of the nursing experience, it is actually a sign that something isn’t quite right. “Nursing your baby should be enjoyable,” says Robin Hollen, Breastfeeding Medicine Specialist with Renown Health. For over 30 years Robin has been supporting moms to breastfeed. Below she shares some valuable information and tips, helping you create a happy and healthy breastfeeding experience for you and your baby. What causes sore nipples? The most common cause of sore nipples involves incorrect latching. For a proper latch, a baby’s mouth takes in the entire nipple and some of the breast, so that the nipple rests at the back of the mouth where the palate is soft. With an improper latch, the mouth may slip down to the tip of the nipple while the baby nurses. This constant pressure on your sensitive skin may cause discomfort and pain. A board-certified lactation consultant can help assess if your baby is latched correctly and troubleshoot your breastfeeding concerns. Less common causes of sore nipples include: • Improper tongue placement of baby • Clenching • Incorrect breast pump use How can a mother prevent sore nipples from an improper latch? Breastfeeding is a learning experience for both mom and baby. Ask for help with the latch so your baby learns it correctly and maintains its depth. In the past, new mothers were surrounded by a community of women — their own mothers, grandmothers, or other family and friends — to provide assistance and guidance with every latch at the beginning of an infant’s life. In today’s culture, new moms can find themselves on their own with no extended family to lend their knowledge. Nurses, pediatricians and lactation consultants now fill that role; they are the eyes and hands along with the much-needed experience to guide new mothers. Our Breastfeeding Medicine experts assist nursing moms with latch every day. Even a single visit with a lactation consultant observing your breastfeeding baby can provide valuable insight on achieving, and maintaining, the proper latch - preventing future nipple soreness and discomfort. How to heal sore nipples from breastfeeding To heal sore nipples, you must first fix the cause, and correcting the latch prevents further damage. A lactation consultant can also help you address the pain. Below are some breast healing tips: • Your own expressed breast milk is excellent to rub into the nipple for anti-bacterial protection. • For those moms who need more lubricant or fat than breast milk offers, use a lanolin or a cream that is labeled safe for the baby. • Soothies are a gel pads providing comfort in between feedings, but should not be used with lanolin products. • Breast shells, not to be confused with shields, can guard the nipples from irritation or pressure in between feedings. If you have more questions about preventing and healing sore nipples or general breastfeeding concerns, talk to your pediatrician or a Renown Health Breastfeeding Medicine specialist at 775-982-6365.
Read More About Breast Feeding Doesn't Have To Mean Sore Nipples